开发WPF应用程序,就不得不提MVVM。下面偶将展示MVVM中简单的实现,其中主要在于ICommand的实现上,不过这种实现方式,应该不会有多少人在开发中使用,在此仅作学习使用。
准备:
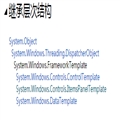
界面绘制,简单的以一个输入框TextBox和一个按钮Button组成。
入手
接下来写ViewModel,注意其中ViewModel需要继承接口INotifyPropertyChanged,其主要功能是保证后台属性改变能够通知到前台改变。
class="brush: csharp; auto-links: true; collapse: true; first-line: 1; gutter: true; html-script: false; light: false; ruler: false; smart-tabs: true; tab-size: 4; toolbar: true;">class TestViewModel : INotifyPropertyChanged
    {

        private string teststr;
        /// <summary>
        /// 待通知字符串
        /// </summary>
        public string TestStr
        {
            get { return teststr; }
            set
            {
                teststr = value;
                RaiseChanged("TestStr");
            }
        }

        /// <summary>
        /// 测试命令
        /// </summary>
        public ICommand TestCommand { get; set; }


        public TestViewModel()
        {
            TestCommand = new TestCommand(this);
        }

        #region INotifyPropertyChanged接口实现
        public void RaiseChanged(string propertyname)
        {
            if (PropertyChanged != null)
            {
                PropertyChanged(this, new PropertyChangedEventArgs(propertyname));
            }
        }
        public event PropertyChangedEventHandler PropertyChanged;
        #endregion
    }
代码中我们看到在TestViewModel中使用了一个TestCommand类。一下是此类的实现,其主要是ICommand的一个实现【开发中不建议使用】
class TestCommand : ICommand
    {

        public TestCommand(TestViewModel viemo)
        {
            viewmodel = viemo;
        }

        TestViewModel viewmodel{get;set;}

        public event EventHandler CanExecuteChanged
        {
            add { CommandManager.RequerySuggested += value; }
            remove { CommandManager.RequerySuggested -= value; }
        }

        int i = 0;

        /// <summary>
        /// 命令是否可用
        /// </summary>
        /// <param name="parameter"></param>
        /// <returns></returns>
        public bool CanExecute(object parameter)
        {
            return true;
        }

        /// <summary>
        /// 命令执行的操作
        /// </summary>
        /// <param name="parameter"></param>
        public void Execute(object parameter)
        {
            i++;
            viewmodel.TestStr = i.ToString();
        }

    }
最后就是将ViewModel内容绑定到界面啦!
XAML:
<Window x:Class="WPF_MVVM.MainWindow"
        xmlns="http://schemas.microsoft.com/winfx/2006/xaml/presentation"
        xmlns:x="http://schemas.microsoft.com/winfx/2006/xaml"
        Title="MainWindow" Height="350" Width="525">
    <Grid>
        <Grid.RowDefinitions>
            <RowDefinition Height="*"/>
            <RowDefinition Height="50"/>
        </Grid.RowDefinitions>
        <TextBox Text="{Binding TestStr}"/>
        <Button Grid.Row="1" Content="Test" Command="{Binding TestCommand}" />
    </Grid>
</Window>
CodeBehind:
 public partial class MainWindow : Window
    {
        public MainWindow()
        {
            InitializeComponent();
            this.DataContext = new TestViewModel();
        }
    }
这样一个简单的MVVM程序就实现啦。哦,对了,这里未用到Model,可以说还不是一个完整的MVVM,这个就留给自己去思考吧。
项目代码托管地址:https://wpfmvvm.codeplex.com/


![[WPF实用技巧]如何使WPF的TreeView节点之间有连线](/Upload/SmallIMG/2014122823/16EA820323965CBF.png)

