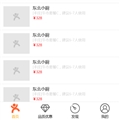
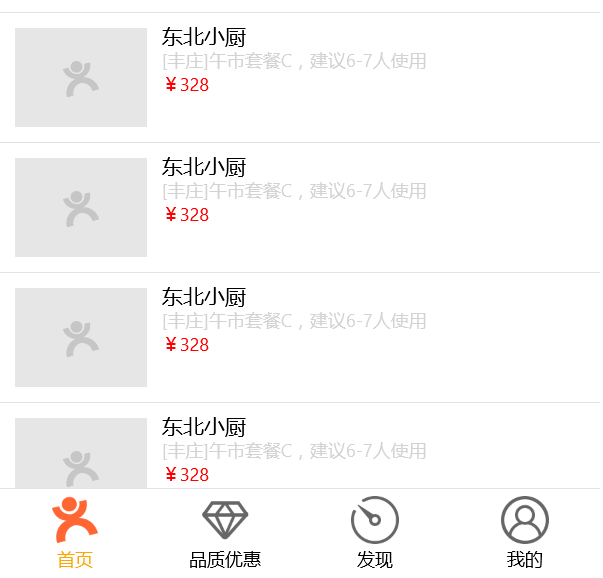
先看效果:
我并没有找到有设置ListView分割线的属性
下面是一个比较简单的实现,如果有同学有更好的实现,欢迎留言,让我们共同进步。我的叙述不一定准确
实现的方法就是在DataTemplate里包一个Border
1、首先自定义一个UserControl来实现布局,文件名为ItemView.xaml,代码如下
xaml代码
 1 <UserControl
 2     x:Class="Demo.UWP.ItemViews.NewsItemView"
 3     xmlns="http://schemas.microsoft.com/winfx/2006/xaml/presentation"
 4     xmlns:x="http://schemas.microsoft.com/winfx/2006/xaml"
 5     xmlns:controls="using:Microsoft.Toolkit.Uwp.UI.Controls"
 6     xmlns:d="http://schemas.microsoft.com/expression/blend/2008"
 7     xmlns:local="using:Demo.UWP.ItemViews"
 8     xmlns:mc="http://schemas.openxmlformats.org/markup-compatibility/2006"
 9     d:DesignHeight="300"
10     d:DesignWidth="400"
11     mc:Ignorable="d">
12     <Border BorderBrush="#e3e3e3" BorderThickness="0,0.5,0,0">
13         <Grid>
14             <Grid.ColumnDefinitions>
15                 <ColumnDefinition Width="Auto" />
16                 <ColumnDefinition Width="*" />
17             </Grid.ColumnDefinitions>
18             <Grid.RowDefinitions>
19                 <RowDefinition Height="Auto" />
20             </Grid.RowDefinitions>
21             <controls:ImageEx
22                 Grid.Column="0"
23                 Width="88"
24                 Height="66"
25                 Margin="10"
26                 HorizontalAlignment="Center"
27                 VerticalAlignment="Center"
28                 IsCacheEnabled="True"
29                 PlaceholderSource="{x:Bind News.PlaceholderSource}"
30                 PlaceholderStretch="UniformToFill"
31                 Source="{x:Bind News.ImgUrl}"
32                 Stretch="UniformToFill" />
33
34             <Grid
35                 Grid.Row="0"
36                 Grid.Column="1"
37                 Margin="0,0,10,5">
38                 <Grid.ColumnDefinitions>
39                     <ColumnDefinition Width="*" />
40                 </Grid.ColumnDefinitions>
41                 <Grid.RowDefinitions>
42                     <RowDefinition Height="Auto" />
43                     <RowDefinition Height="Auto" />
44                     <RowDefinition Height="Auto" />
45                 </Grid.RowDefinitions>
46                 <TextBlock
47                     Grid.Row="0"
48                     Grid.Column="0"
49                     Margin="0,5,0,0"
50                     FontSize="14"
51                     Foreground="Black"
52                     Text="{x:Bind News.Title}"
53                     TextWrapping="Wrap" />
54                 <TextBlock
55                     Grid.Row="1"
56                     Grid.Column="0"
57                     Margin="0,0,0,0"
58                     FontSize="12"
59                     Foreground="LightGray"
60                     Text="{x:Bind News.SubTitle}"
61                     TextWrapping="Wrap" />
62                 <TextBlock
63                     Grid.Row="2"
64                     Grid.Column="0"
65                     Margin="0,0,0,0"
66                     FontSize="12"
67                     Foreground="Red"
68                     Text="{x:Bind News.Price}"
69                     TextWrapping="Wrap" />
70             </Grid>
71         </Grid>
72     </Border>
73 </UserControl>
logs_code_collapse">View Code
cs代码

 1 using Demo.UWP.Models;
 2 using System;
 3 using System.Collections.Generic;
 4 using System.IO;
 5 using System.Linq;
 6 using System.Runtime.InteropServices.WindowsRuntime;
 7 using Windows.Foundation;
 8 using Windows.Foundation.Collections;
 9 using Windows.UI.Xaml;
10 using Windows.UI.Xaml.Controls;
11 using Windows.UI.Xaml.Controls.Primitives;
12 using Windows.UI.Xaml.Data;
13 using Windows.UI.Xaml.Input;
14 using Windows.UI.Xaml.Media;
15 using Windows.UI.Xaml.Navigation;
16
17 // The User Control item template is documented at https://go.microsoft.com/fwlink/?LinkId=234236
18
19 namespace Demo.UWP.ItemViews
20 {
21     public sealed partial class NewsItemView : UserControl
22     {
23         public NewsBean News => this.DataContext as NewsBean;
24         public NewsItemView()
25         {
26             this.InitializeComponent();
27             this.DataContextChanged += (s, e) => Bindings.Update();
28         }
29     }
30 }
View Code
这里用到了x:Bind,需要知道绑定数据的类型,将DataContext转换为NewsBean对象,(=>其实就是定义属性的简写)
2、定义一个ListView
 1     <Page.Resources>
 2         <ResourceDictionary>
 3             <DataTemplate x:Key="NewsTemplate">
 4                 <local:NewsItemView />
 5             </DataTemplate>
 6         </ResourceDictionary>
 7     </Page.Resources>
 8     <ListView
 9         IsItemClickEnabled="True"
10         ItemContainerStyle="{StaticResource ListViewItemStyle1}"
11         ItemTemplate="{StaticResource NewsTemplate}"
12         ItemsSource="{x:Bind NewsList}"
13         SelectionMode="None" />
ViewModel
 1 public ObservableCollection<ItemData> NewsList { get; set; }
 2
 3         public HomeViewModel()
 4         {
 5             NewsList = new ObservableCollection<ItemData>
 6             {
 7                 new NewsBean() {Title = "东北小厨", SubTitle = "[丰庄]午市套餐C,建议6-7人使用", Price = "¥328", ItemType = 2},
 8                 new NewsBean() {Title = "东北小厨", SubTitle = "[丰庄]午市套餐C,建议6-7人使用,建议6-7人使用,建议6-7人使用", Price = "¥328", ItemType = 2},
 9                 new NewsBean() {Title = "东北小厨", SubTitle = "[丰庄]午市套餐C,建议6-7人使用", Price = "¥328", ItemType = 2},
10                 new NewsBean() {Title = "东北小厨", SubTitle = "[丰庄]午市套餐C,建议6-7人使用", Price = "¥328", ItemType = 2},
11                 new NewsBean() {Title = "东北小厨", SubTitle = "[丰庄]午市套餐C,建议6-7人使用", Price = "¥328", ItemType = 2},
12                 new NewsBean() {Title = "东北小厨", SubTitle = "[丰庄]午市套餐C,建议6-7人使用", Price = "¥328", ItemType = 2},
13                 new NewsBean() {Title = "东北小厨", SubTitle = "[丰庄]午市套餐C,建议6-7人使用", Price = "¥328", ItemType = 2},
14                 new NewsBean() {Title = "东北小厨", SubTitle = "[丰庄]午市套餐C,建议6-7人使用", Price = "¥328", ItemType = 2},
15                 new NewsBean() {Title = "东北小厨", SubTitle = "[丰庄]午市套餐C,建议6-7人使用", Price = "¥328", ItemType = 2}
16             };
17
18         }
3、发现了一个问题,分割线没有撑满,怎么办呢?
更改ItemContainerStyle
<Style x:Key="ListViewItemStyle1" TargetType="ListViewItem"
    <!--去除默认边距-->
   <Setter Property="Padding" Value="0" />
    <!--让宽度撑满-->
    <Setter Property="HorizontalContentAlignment" Value="Stretch" />
</Style>
转载请标明出处:http://www.cnblogs.com/xiaocaidev/p/6995743.html,本文出自:【xiaocaidev的博客】