导语:之前做习惯了Framework层的开发,今天在武汉斗鱼公司面试APP客户端的开发,其中一道题是讲述Asynctask的优缺点,我靠,我只是知道有这么一个东西,会用而已,看来之前的生活太过于安逸,这么基础的东西都不会,特意回家总结下。
转载请注明原文链接:http://www.cnblogs.com/yanyojun/p/6414919.html
Asynctask作为Android的基础之一,怎么使用就不多讲解了,网上到处都是教程,建议查看Android官方API文档:https://developer.android.google.cn/reference/android/os/AsyncTask.html
这里只实现一个小Demo程序,供大家赏玩:
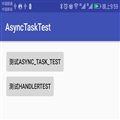
界面:

这个程序其实特别简单,就是两个按钮,点击分别用来测试AysncTask和Handler两种模式的实现,点击后会有相应的Log提示。
功能简介:
Asynctask的实现:
   private class IAsyncTask extends AsyncTask<String, Integer, String> {
        protected String doInBackground(String... args1) {
            Log.i(TAG, "doInBackground in:" + args1[0]);
            int times = 10;
            for (int i = 0; i < times; i++) {
                publishProgress(i);//提交之后,会执行onProcessUpdate方法
            }
            Log.i(TAG, "doInBackground out");
            return "over";
        }

        /**
         * 在调用cancel方法后会执行到这里
         */
        protected void onCancelled() {
            Log.i(TAG, "onCancelled");
        }

        /**
         * 在doInbackground之后执行
         */
        protected void onPostExecute(String args3) {
            Log.i(TAG, "onPostExecute:" + args3);
        }

        /**
         * 在doInBackground之前执行
         */
        @Override
        protected void onPreExecute() {
            Log.i(TAG, "onPreExecute");
        }

        /**
         * 特别赞一下这个多次参数的方法,特别方便
         * @param args2
         */
        @Override
        protected void onProgressUpdate(Integer... args2) {
            Log.i(TAG, "onProgressUpdate:" + args2[0]);
        }
    }
点击第一个按钮后会执行这里,点击按钮的写法如下:
        mBtnSyncTask.setOnClickListener(new View.OnClickListener() {
            @Override
            public void onClick(View v) {
                new IAsyncTask().execute("yanlog test");
            }
        });
执行结果的Log如下:
 1 02-19 21:55:12.179 10824-11010/com.plbear.asynctasktest I/AsyncTaskTest: doInBackground in:yanlog test//doInbackground是在10824进程,11010线程中执行
 2 02-19 21:55:12.179 10824-11010/com.plbear.asynctasktest I/AsyncTaskTest: doInBackground out
 3 02-19 21:55:12.184 10824-10824/com.plbear.asynctasktest I/AsyncTaskTest: onProgressUpdate:0//剩下的都是在10824线程中执行,Android特别好的是,主线程的线程号跟进程号是一致的
 4 02-19 21:55:12.184 10824-10824/com.plbear.asynctasktest I/AsyncTaskTest: onProgressUpdate:1
 5 02-19 21:55:12.184 10824-10824/com.plbear.asynctasktest I/AsyncTaskTest: onProgressUpdate:2
 6 02-19 21:55:12.184 10824-10824/com.plbear.asynctasktest I/AsyncTaskTest: onProgressUpdate:3
 7 02-19 21:55:12.184 10824-10824/com.plbear.asynctasktest I/AsyncTaskTest: onProgressUpdate:4
 8 02-19 21:55:12.184 10824-10824/com.plbear.asynctasktest I/AsyncTaskTest: onProgressUpdate:5
 9 02-19 21:55:12.184 10824-10824/com.plbear.asynctasktest I/AsyncTaskTest: onProgressUpdate:6
10 02-19 21:55:12.184 10824-10824/com.plbear.asynctasktest I/AsyncTaskTest: onProgressUpdate:7
11 02-19 21:55:12.184 10824-10824/com.plbear.asynctasktest I/AsyncTaskTest: onProgressUpdate:8
12 02-19 21:55:12.184 10824-10824/com.plbear.asynctasktest I/AsyncTaskTest: onProgressUpdate:9
13 02-19 21:55:12.184 10824-10824/com.plbear.asynctasktest I/AsyncTaskTest: onPostExecute:over
Handler+Message实现:
主要代码如下:
 1     private class IHandler extends Handler{
 2         @Override
 3         public void handleMessage(Message msg){
 4             switch(msg.what){
 5                 case 1:
 6                     Log.e(TAG,"handler:"+msg.obj);
 7                     break;
 8                 default:
 9                     break;
10             }
11         }
12     }
其中,调用地方如下:
 1         mBtnHandlerTest.setOnClickListener(new View.OnClickListener() {
 2             @Override
 3             public void onClick(View v) {
 4                 final Handler handler = new IHandler();
 5                 new Thread(new Runnable() {
 6                     @Override
 7                     public void run() {
 8                         for (int i = 0; i < 10; i++) {
 9                             Message msg = new Message();
10                             msg.what = 1;
11                             msg.obj = new Integer(i);
12                             Log.e(TAG, "post message:" + i);
13                             handler.sendMessage(msg);
14                         }
15                     }
16                 }).start();
17             }
18         });
可以看到Log打印结果如下:
 1 02-19 22:25:17.689 9234-9319/com.plbear.asynctasktest E/AsyncTaskTest: post message:0 //可以看到提交是在9319号子进程中提交
 2 02-19 22:25:17.689 9234-9319/com.plbear.asynctasktest E/AsyncTaskTest: post message:1
 3 02-19 22:25:17.689 9234-9319/com.plbear.asynctasktest E/AsyncTaskTest: post message:2
 4 02-19 22:25:17.689 9234-9319/com.plbear.asynctasktest E/AsyncTaskTest: post message:3
 5 02-19 22:25:17.689 9234-9319/com.plbear.asynctasktest E/AsyncTaskTest: post message:4
 6 02-19 22:25:17.689 9234-9319/com.plbear.asynctasktest E/AsyncTaskTest: post message:5
 7 02-19 22:25:17.689 9234-9319/com.plbear.asynctasktest E/AsyncTaskTest: post message:6
 8 02-19 22:25:17.689 9234-9319/com.plbear.asynctasktest E/AsyncTaskTest: post message:7
 9 02-19 22:25:17.689 9234-9319/com.plbear.asynctasktest E/AsyncTaskTest: post message:8
10 02-19 22:25:17.689 9234-9319/com.plbear.asynctasktest E/AsyncTaskTest: post message:9
11 02-19 22:25:17.692 9234-9234/com.plbear.asynctasktest E/AsyncTaskTest: handler:0 //可以看到提交完是在9234主线程中执行。
12 02-19 22:25:17.692 9234-9234/com.plbear.asynctasktest E/AsyncTaskTest: handler:1
13 02-19 22:25:17.692 9234-9234/com.plbear.asynctasktest E/AsyncTaskTest: handler:2
14 02-19 22:25:17.692 9234-9234/com.plbear.asynctasktest E/AsyncTaskTest: handler:3
15 02-19 22:25:17.692 9234-9234/com.plbear.asynctasktest E/AsyncTaskTest: handler:4
16 02-19 22:25:17.692 9234-9234/com.plbear.asynctasktest E/AsyncTaskTest: handler:5
17 02-19 22:25:17.692 9234-9234/com.plbear.asynctasktest E/AsyncTaskTest: handler:6
18 02-19 22:25:17.692 9234-9234/com.plbear.asynctasktest E/AsyncTaskTest: handler:7
19 02-19 22:25:17.692 9234-9234/com.plbear.asynctasktest E/AsyncTaskTest: handler:8
20 02-19 22:25:17.692 9234-9234/com.plbear.asynctasktest E/AsyncTaskTest: handler:9
以上,简单梳理了下怎么实现,不赘言。
关于Handler+Message+Message Queue+Looper的实现就不介绍了,老生常谈了。所以下面主要看一下AsyncTask的源码实现:
AsyncTask的核心方法应该是
public final AsyncTask<Params, Progress, Result> execute(Params... params)
那我们就看下当调用了execute方法后,都发生了什么,下面是执行的序列图。

我知道我画的不够标准了,凑合着看吧。下面关于这个图的一些说明。
嗯,就这么多吧。关于AsyncTask的源码我上传到github中了,大家对照着源码看会更清楚一点。
https://github.com/YanYoJun/AndroidSource/blob/master/AsyncTask.java
关于AsyncTask的源码分析,还有一篇博客写的很好,请参看:
http://www.infocool.net/kb/OtherMobile/201610/197431.html
备注:
源码里面还有三个地方值得深究下,分别是:
简单,快捷
这个说法就是近乎于扯淡吧,主要还是看使用习惯,我就挺喜欢用Handler的。
但是Android定义了这个东西,可以看到各种消息封装的还是很不错的,很规范。大家可以按照这个“优美的框架”来写,代码不会太出格。
3.1 AsyncTask实际上后台线程之后一个!!!
今天仔细研究了下源码,发现网上写的大部分是错的,AsyncTask的真正的后台线程只有一个!!不信,看下面的代码:
我们首先定义一个IAsyncTAsk,其中的doInBackground方法这么写:
    private class IAsyncTask extends AsyncTask<String, Integer, String> {
        protected String doInBackground(String... args1) {
/*            Log.i(TAG, "doInBackground in:" + args1[0]);
            int times = 10;
            for (int i = 0; i < times; i++) {
                publishProgress(i);//提交之后,会执行onProcessUpdate方法
            }
            Log.i(TAG, "doInBackground out");*/

            Log.i(TAG, "doInBackground in thread:" + args1[0]);
            try {
                int times = 4;
                for (int i = 0; i < times; i++) {
                    Log.i(TAG, "thread alive:" + i + " for times"+args1[0]); //这个doInBackground就打印一个Log,然后sleep 20 毫秒
                    Thread.sleep(20);
                }
            } catch (Exception e) {

            }
            return "over";
        }
调用的地方这么写:
1                 int N = 5;
2                 for (int i = 0; i < N; i++) {
3                     Log.d(TAG,"asyncTask post Task:"+i);
4                     new IAsyncTask().execute("asyncTask times:"+i); //点击Button后,在onClick方法中建立5个后台子线程。
5                 }
我们来看打印结果:
 1 02-20 21:48:08.206 14812-14812/com.plbear.asynctasktest D/AsyncTaskTest: asyncTask post Task:0 //在主线程中进行提交操作
 2 02-20 21:48:08.211 14812-14812/com.plbear.asynctasktest D/AsyncTaskTest: asyncTask post Task:1
 3 02-20 21:48:08.211 14812-14812/com.plbear.asynctasktest D/AsyncTaskTest: asyncTask post Task:2
 4 02-20 21:48:08.211 14812-14812/com.plbear.asynctasktest D/AsyncTaskTest: asyncTask post Task:3
 5 02-20 21:48:08.211 14812-14812/com.plbear.asynctasktest D/AsyncTaskTest: asyncTask post Task:4
 6 02-20 21:48:08.212 14812-18067/com.plbear.asynctasktest I/AsyncTaskTest: doInBackground in thread:asyncTask times:0 //可以看到,虽然系统开起了18067、18068、
 7 02-20 21:48:08.212 14812-18067/com.plbear.asynctasktest I/AsyncTaskTest: thread alive:0 for timesasyncTask times:0//18069,18070这几个子线程,但是这几个子线程
 8 02-20 21:48:08.232 14812-18067/com.plbear.asynctasktest I/AsyncTaskTest: thread alive:1 for timesasyncTask times:0 //是串行执行的!!!震惊了有没有!!!
 9 02-20 21:48:08.253 14812-18067/com.plbear.asynctasktest I/AsyncTaskTest: thread alive:2 for timesasyncTask times:0 //这不是巧合,试了好几次都是这样!!
10 02-20 21:48:08.273 14812-18067/com.plbear.asynctasktest I/AsyncTaskTest: thread alive:3 for timesasyncTask times:0
11 02-20 21:48:08.294 14812-18068/com.plbear.asynctasktest I/AsyncTaskTest: doInBackground in thread:asyncTask times:1
12 02-20 21:48:08.294 14812-18068/com.plbear.asynctasktest I/AsyncTaskTest: thread alive:0 for timesasyncTask times:1
13 02-20 21:48:08.315 14812-18068/com.plbear.asynctasktest I/AsyncTaskTest: thread alive:1 for timesasyncTask times:1
14 02-20 21:48:08.335 14812-18068/com.plbear.asynctasktest I/AsyncTaskTest: thread alive:2 for timesasyncTask times:1
15 02-20 21:48:08.356 14812-18068/com.plbear.asynctasktest I/AsyncTaskTest: thread alive:3 for timesasyncTask times:1
16 02-20 21:48:08.377 14812-18069/com.plbear.asynctasktest I/AsyncTaskTest: doInBackground in thread:asyncTask times:2
17 02-20 21:48:08.377 14812-18069/com.plbear.asynctasktest I/AsyncTaskTest: thread alive:0 for timesasyncTask times:2
18 02-20 21:48:08.397 14812-18069/com.plbear.asynctasktest I/AsyncTaskTest: thread alive:1 for timesasyncTask times:2
19 02-20 21:48:08.417 14812-18069/com.plbear.asynctasktest I/AsyncTaskTest: thread alive:2 for timesasyncTask times:2
20 02-20 21:48:08.438 14812-18069/com.plbear.asynctasktest I/AsyncTaskTest: thread alive:3 for timesasyncTask times:2
21 02-20 21:48:08.462 14812-18070/com.plbear.asynctasktest I/AsyncTaskTest: doInBackground in thread:asyncTask times:3
22 02-20 21:48:08.462 14812-18070/com.plbear.asynctasktest I/AsyncTaskTest: thread alive:0 for timesasyncTask times:3
23 02-20 21:48:08.483 14812-18070/com.plbear.asynctasktest I/AsyncTaskTest: thread alive:1 for timesasyncTask times:3
24 02-20 21:48:08.504 14812-18070/com.plbear.asynctasktest I/AsyncTaskTest: thread alive:2 for timesasyncTask times:3
25 02-20 21:48:08.524 14812-18070/com.plbear.asynctasktest I/AsyncTaskTest: thread alive:3 for timesasyncTask times:3
26 02-20 21:48:08.545 14812-18070/com.plbear.asynctasktest I/AsyncTaskTest: doInBackground in thread:asyncTask times:4
27 02-20 21:48:08.545 14812-18070/com.plbear.asynctasktest I/AsyncTaskTest: thread alive:0 for timesasyncTask times:4
28 02-20 21:48:08.565 14812-18070/com.plbear.asynctasktest I/AsyncTaskTest: thread alive:1 for timesasyncTask times:4
29 02-20 21:48:08.585 14812-18070/com.plbear.asynctasktest I/AsyncTaskTest: thread alive:2 for timesasyncTask times:4
30 02-20 21:48:08.606 14812-18070/com.plbear.asynctasktest I/AsyncTaskTest: thread alive:3 for timesasyncTask times:4
你本来希望系统应该这么执行

但是实际上系统是这么执行的:

那么从源码看下为啥会这样吧。
AsyncTask中默认的Exector是这个private static volatile Executor sDefaultExecutor = SERIAL_EXECUTOR;看下SERIAL_EXECUTOR是这么定义的
 1 public static final Executor SERIAL_EXECUTOR = new SerialExecutor(); //这是一个串行处理的Executor
 2 .........................
 3     private static class SerialExecutor implements Executor {
 4         final ArrayDeque<Runnable> mTasks = new ArrayDeque<Runnable>();
 5         Runnable mActive;
 6
 7         public synchronized void execute(final Runnable r) {
 8             mTasks.offer(new Runnable() { //先把要执行的子线程统一丢到mTasks队列中,这其中封装一遍Runnable
 9                 public void run() {
10                     try {
11                         r.run();
12                     } finally {
13                         scheduleNext(); //当前面一个子线程处理完,开始处理下一个
14                     }
15                 }
16             });
17             if (mActive == null) {
18                 scheduleNext();
19             }
20         }
21
22         protected synchronized void scheduleNext() { //依次从队列中取下一个元素,串行执行
23             if ((mActive = mTasks.poll()) != null) {
24                 THREAD_POOL_EXECUTOR.execute(mActive);
25             }
26         }
27     }
呵呵,这下子明白了吧。
Google为什么要怎么实现我不得而知,估计有什么我没有明白的好处在里面吧。那么有没有办法规避呢?
可以看到上面有一个THREAD_POOL_EXECUTOR,这个也是一个executor是这么定义的
1     static {
2         ThreadPoolExecutor threadPoolExecutor = new ThreadPoolExecutor(
3                 CORE_POOL_SIZE, MAXIMUM_POOL_SIZE, KEEP_ALIVE_SECONDS, TimeUnit.SECONDS,
4                 sPoolWorkQueue, sThreadFactory);
5         threadPoolExecutor.allowCoreThreadTimeOut(true);
6         THREAD_POOL_EXECUTOR = threadPoolExecutor;
7     }
可以看到这个是允许一定数量的子线程并行处理的。
其中参数是这么定义的
    private static final int CPU_COUNT = Runtime.getRuntime().availableProcessors();
    // We want at least 2 threads and at most 4 threads in the core pool,
    // preferring to have 1 less than the CPU count to avoid saturating
    // the CPU with background work
    private static final int CORE_POOL_SIZE = Math.max(2, Math.min(CPU_COUNT - 1, 4));
    private static final int MAXIMUM_POOL_SIZE = CPU_COUNT * 2 + 1;
    private static final int KEEP_ALIVE_SECONDS = 30;
按照一般理解,允许同时运行的CORE进程是4个,MAXIMUM_POOL_SIZE是17个。(注:这个数字是我用荣耀8手机跑出来的,其他手机可能会有不同)
而Android中的AsyncTask提供了一个方法:
1     public static void setDefaultExecutor(Executor exec) {
2         sDefaultExecutor = exec;
3     }
所以规避方法是:通过这个方法可以设置默认的Exector,但是这个方法是hide的,也就是Google的隐藏方法,估计需要用一下反射来处理。我偷个懒,不去实现了。
本来嘛,我只是想简单写一下AsyncTask的一些相关知识,Copy一下网上的内容,但是没有想到写到最后,发现网上的大部分东西是错的,或者没有抓到重点。看来以后还是要自己亲自看代码,纸上得来终觉浅,便知此事要躬行。
本文中用到的工程代码可以到我的github中查看,路径:https://github.com/YanYoJun/AsyncTaskTest
好了,写完了,大家看到之后觉得还可以的话,点个赞哈。