1.单位全部用dp,优先使用包裹内容和填充父窗体和权重来完成布局。
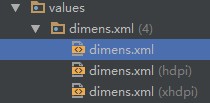
2.通过dimens文件来适配,需要三套,不考虑横屏
2.1 默认的dimens.xml 放按hdpi适配的参数;
2.2 hdpi的dimens.xml 放按hdpi适配的参数;
2.3 xhdpi的dimens.xml 放按xhdpi适配的参数;
3.适配的时候只用完美的完成一套xhdpi的dimens文件,然后通过代码生成hdpi的,因为就dp来说,他们有固定的比例关系,代码后面会贴出。
贴一个基本知识:
ldpi 1dp = 0.75px 320*240 160dp = 120px mdpi 1dp = 1px 480*320 160dp = 160px hdpi 1dp = 1.5px 800*480 160dp = 240px xhdpi 1dp = 2px 1280*720 160dp = 320px<360px 180dp = 360px xxhdpi 1dp = 3px 1920*1080 160dp = 480px < 540px 180dp = 540px先说测试结果:
1.没有ldpi和mdpi对应的dimens.xml的情况下:会加载默认的dimens.xml
2.而hdpi,xhdpi,xxhdpi这三种会加载最近的dimens.xml文件
下面是测试过程:
我的测试dimens:
--默认的dimens.xml
<resources>
    <dimen name="activity_horizontal_margin">5dp</dimen>
    <dimen name="activity_vertical_margin">5dp</dimen>
</resources>
--hdpi的dimens.xml:
<resources>
    <dimen name="activity_horizontal_margin">50dp</dimen>
    <dimen name="activity_vertical_margin">50dp</dimen>
</resources>
--xhdpi的dimens.xml:
<resources>
    <dimen name="activity_horizontal_margin">500dp</dimen>
    <dimen name="activity_vertical_margin">100dp</dimen>
</resources>
测试布局:
<RelativeLayout xmlns:android="http://schemas.android.com/apk/res/android"
                android:layout_width="match_parent"
                android:layout_height="match_parent">

    <TextView
        android:layout_centerInParent="true"
        android:background="#000000"
        android:layout_width="@dimen/activity_horizontal_margin"
        android:layout_height="@dimen/activity_vertical_margin"/>

</RelativeLayout>
在不同分辨率手机下的效果:(为了好看一些,图片大小被我拉伸过),下面依次为:ldpi,mdpi,hdpi,hdpi(删除hdpi对应的dimens之后),xhdpi,xxhdpi
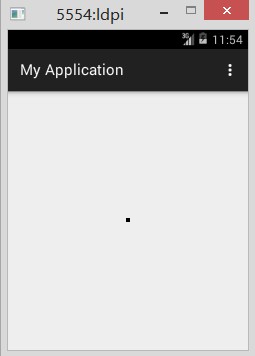
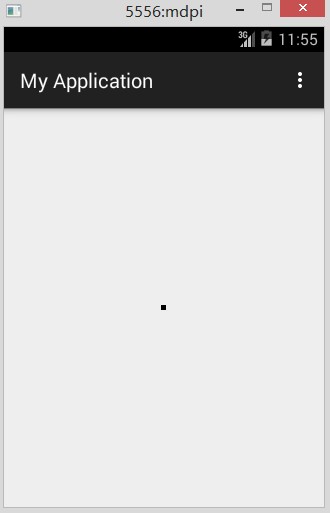
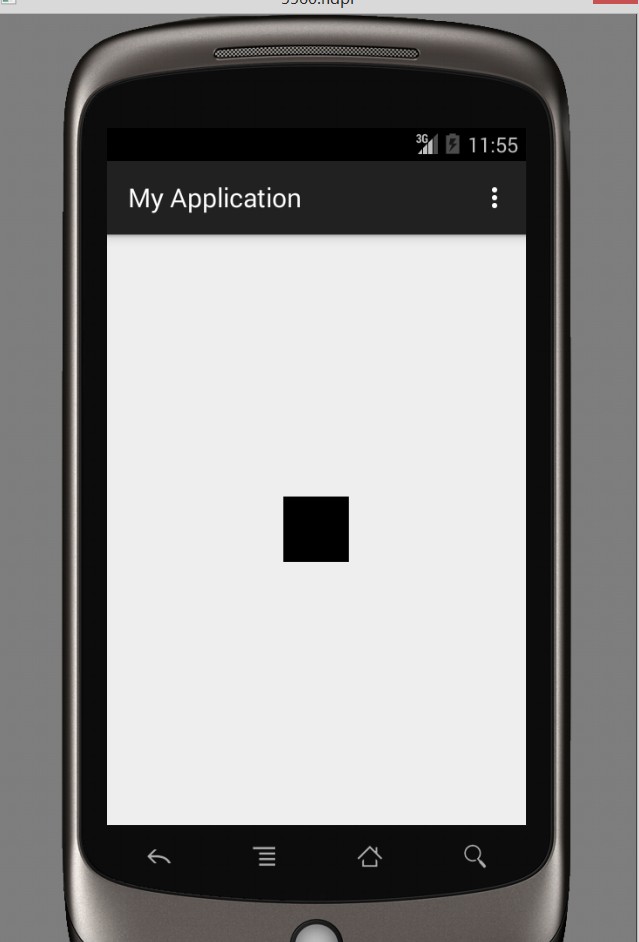
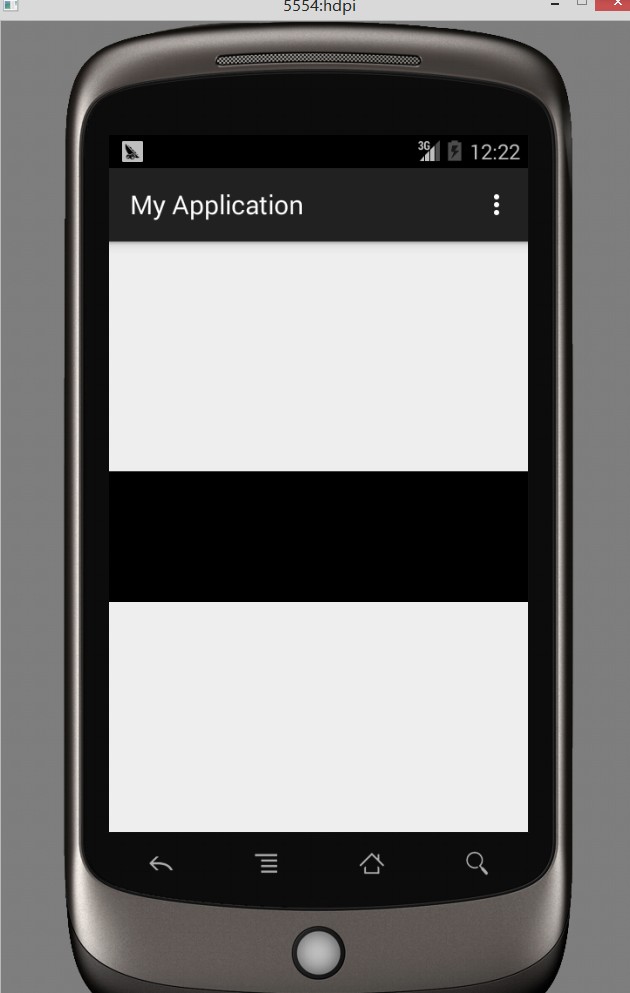

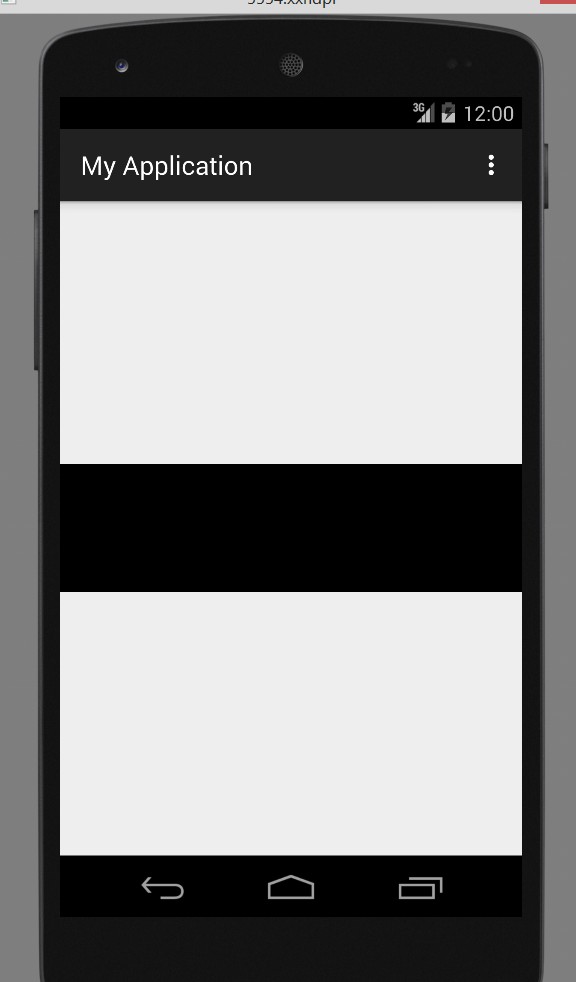
(ldpi) (mdpi) (hdpi) hdpi(删除hdpi对应的dimens之后) (xhdpi) (xxhdpi)
分析结果:
1.ldpi和mdpi在没有对应的dimens的情况下,会去加载默认的dimens。而ldpi和mdpi和hdpi可以共用一套。 所以默认的dimens放hdpi的标准。
2.hdpi,xhdpi,xxhdpi会加载最近的dimens文件,所以删除hdpi对应的之后,加载了xhdpi的dimens。 所以要放一套hdpi的dimens。
3.xhdpi和xxhdpi用的一套标准,他们又会加载最近的。 所以要放一套xhdpi的。
也是分两种考虑
1.大图且内容复杂的 2.小图和大图但是内容简单的
有上面贴出的基本知识可算出,ldpi,mdpi和hdpi的长宽缩放比例是一样的;xhdpi和xxhpdi是一样的。
所以关于图片部分的解决方案就是:
1.小图和大图但是内容简单的:
我们就把图片的控件写死,让图片的xy适配控件,发生变形。 只用切一套图,这样图片会有拉伸的情况出现,但是大图但是比如纯色的,拉伸也看不出来,小图拉伸也不明显。所以就这样做。
所以小图或大图且内容简单的解决方案就是,写死控件,让图片的xy适配控件。
2.大图且内容复杂的:
这种图片拉伸变形明显,所以我们要针对不同分辨率做处理:
其中xhdpi(1280*720)和xxhdpi(1920*1080)他们的长宽缩放是成比例的,都是1.5。所以他们可以共用一套图片。放在xhdpi对应的drawable目录下或者xxhdpi对应的drawable目录下即可。
hdpi,mdpi,ldpi,是不成比例的,所以要想获得最佳的适配效果,我们需要分别适配这三套,但是我觉得按现在市场是的手机情况,我们在适配一下hdpi就可以了。class="Apple-tab-span" style="white-space: pre;">
所以大图且复杂的解决方案就是,适配两套,xhdpi的和hdpi的。
(ps:这里讨论的是app原生布局的适配,所以不适用于填充的图片是动态变化的且长宽不成比例的情况,比如,用户上传图片,这里为健壮还要做很多处理,不在讨论的范围内)
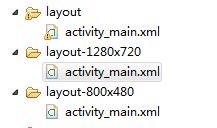
除了用dimens适配还有用layout布局文件适配的方案,通过代码动态设置的方案(我之前启动界面用过一个gif图片 ,就用的动态设置)
对于px,dp,sp,dimens,权重这些基本概念我就不在这里一一介绍了。
转换dimens的代码:old放的是适配xhdpi的,转换比例是xhdpi屏幕的一半是180dp除以hdpi屏幕的一半是160dp得到的1.125. 这样的话只要完美适配一套xhdpi的,然后生成hdpi的就好了。
package convert;
import java.io.BufferedReader;
import java.io.BufferedWriter;
import java.io.File;
import java.io.FileReader;
import java.io.FileWriter;
import java.io.IOException;

public class DimensTools {
     static String oldFilePath = "src/convert/dimens.xml";

     static String filePathHdpi="src/convert/dimensHdpi.xml";


     static float changes = 1.125f;
     public static void main(String[] args) {
          String st = convertStreamToString(oldFilePath, changes);
          DeleteFolder(filePathHdpi);
          writeFile(filePathHdpi, st);
     }
     public static String convertStreamToString(String filepath, float f) {
          StringBuilder sb = new StringBuilder();
          try {
               BufferedReader bf = new BufferedReader(new FileReader(filepath));
               String line = null;
               System.out.println("q1");
               String endmark = "dp</dimen>";
               String startmark = ">";
               while ((line = bf.readLine()) != null) {
                    if (line.contains(endmark)) {
                         int end = line.lastIndexOf(endmark);
                         int start = line.indexOf(startmark);
                         String stdp = line.substring(start + 1, end);
                         //int dp = Integer.parseInt(stpx);
                         float dp=Float.parseFloat(stdp);
                         //float newdp =  ((float) dp / f);

                         System.out.println("dp:"+dp);

                         float newdp=dp/f;

                         System.out.println("newdp:"+newdp);

                         String dpStr=String.valueOf(dp);
                         String newline;
                         if(dpStr.contains(".0")){
                             int x=dpStr.indexOf(".");
                             System.out.println("x:"+x);
                             dpStr= dpStr.substring(0,x);
                             newline= line.replace(dpStr + "dp", newdp + "dp");
                         }else{
                             newline = line.replace(dp + "dp", newdp + "dp");
                         }

                         System.out.println("newline:"+newline);
                         sb.append(newline + "\r\n");
                    } else {
                         sb.append(line + "\r\n");
                    }
               }
              // System.out.println(sb.toString());
          } catch (IOException e) {
               e.printStackTrace();
          }
          return sb.toString();
     }
     public static boolean DeleteFolder(String sPath) {
          File file = new File(sPath);
          if (!file.exists()) {
               return true;
          } else {
               if (file.isFile()) {
                    return deleteFile(sPath);
               } else {
               // return deleteDirectory(sPath);
               }
          }
          return false;
     }
     public static void writeFile(String filepath, String st) {
          try {
               FileWriter fw = new FileWriter(filepath);
               BufferedWriter bw = new BufferedWriter(fw);
               bw.write(st);
               bw.flush();
               bw.close();
          } catch (IOException e) {
               e.printStackTrace();
          }
     }
     public static boolean deleteFile(String sPath) {
          boolean flag = false;
          File file = new File(sPath);
          if (file.isFile() && file.exists()) {
               file.delete();
               flag = true;
          }
          return flag;
     }
}
最后,我也是自己摸索,有什么问题,还望大家指点。