    UITapGestureRecognizer *tap=[[UITapGestureRecognizer alloc] initWithTarget:self action:@selector(click)];

    //设置当前需要点击的次数
    [tap setNumberOfTapsRequired:1];
    //设置当前需要触发事件的手指数量
[tap setNumberOfTouchesRequired:2];
//设置当前代理
tap.delegate=self;
[_view addGestureRecognizer:tap];
//触发方法
- (void) click{
    NSLog(@"当前视图被点击了! ");
}
UILongPressGestureRecognizer * longPress=[[UILongPressGestureRecognizer alloc] initWithTarget:self action:@selector(longPress)];
//设置当前长按最小的时长
longPress.minimumPressDuration=2;

//设置允许的移动范围
 [longPress setAllowableMovement:2];
[_view addGestureRecognizer:longPress];
//触发方法
- (void) longPress{
    NSLog(@"长按事件触发! ");
}
UISwipeGestureRecognizer * swip=[[UISwipeGestureRecognizer alloc] initWithTarget:self action:@selector(swipMethod)];
    //往左边方向
  swip.direction=UISwipeGestureRecognizerDirectionLeft  ;
    //往右边方向
  swip.direction=UISwipeGestureRecognizerDirectionRight  ;
    //往上面方向
    swip.direction=UISwipeGestureRecognizerDirectionUp  ;
    //往下面方向
   swip.direction=UISwipeGestureRecognizerDirectionDown  ;
    [_view addGestureRecognizer:swip];

    //触发方法
    - (void) swipMethod{
        NSLog(@"轻扫事件触发! ");
}
如果涉及到2个以上方向的手势最好添加多个UISwipeGestureRecognizer 对象并设置不同的方向,不要通过下面方式用符号|来连接:
swip.direction=UISwipeGestureRecognizerDirectionLeft | UISwipeGestureRecognizerDirectionRight
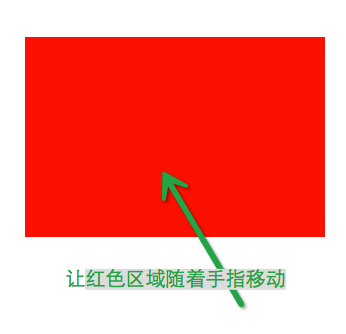
第一步:添加视图
_view=[[UIView alloc] initWithFrame:CGRectMake(50, 250, 300, 200)];
[_view setBackgroundColor:[UIColor redColor]];
[self.view addSubview:_view];
第二步:添加手势
UIPanGestureRecognizer *pan=[[UIPanGestureRecognizer alloc] initWithTarget:self action:@selector(paned:)];
[_view addGestureRecognizer:pan];
第三步:实现方法
- (void) paned:(UIPanGestureRecognizer *) pan{

    //获取移动的大小
    CGPoint point= [pan translationInView:pan.view];
    //更改视图的中心点坐标
    CGPoint points=_view.center;
    points.x+=point.x;
    points.y+=point.y;
    _view.center=points;
    //每次都清空一下消除坐标叠加
    [pan setTranslation:CGPointZero inView:pan.view];
}
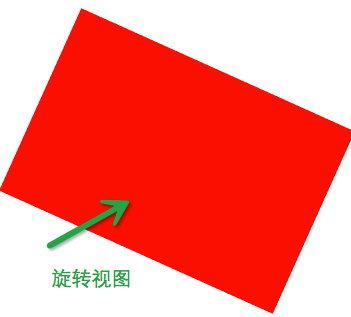
第一步:添加视图
_view=[[UIView alloc] initWithFrame:CGRectMake(50, 250, 300, 200)];
[_view setBackgroundColor:[UIColor redColor]];
[self.view addSubview:_view];
第二步:添加手势
UIRotationGestureRecognizer * roate=[[UIRotationGestureRecognizer alloc] initWithTarget:self action:@selector(rotate:)];
    [_view addGestureRecognizer:roate];
roate.delegate=self;
第三步:实现方法
- (void) rotate:(UIRotationGestureRecognizer *) rote{
   //获取当前旋转的度数
   CGFloat rotation= rote.rotation;
    //通过仿射变换实现旋转
  _view.transform=CGAffineTransformRotate(_view.transform, rotation);
    //防止旋转叠加需要清零
    rote.rotation=0;
}
第一步:添加视图
_view=[[UIView alloc] initWithFrame:CGRectMake(50, 250, 300, 200)];
[_view setBackgroundColor:[UIColor redColor]];
[self.view addSubview:_view];
第二步:添加手势
UIPinchGestureRecognizer * pich=[[UIPinchGestureRecognizer alloc] initWithTarget:self action:@selector(piches:)];
[_view addGestureRecognizer:pich];
pich.delegate=self;
第三步:实现方法
- (void) piches:(UIPinchGestureRecognizer *) pich{
    //获取比例
    CGFloat scale=pich.scale;
    //通过仿射变换实现缩放
    _view.transform=CGAffineTransformScale(_view.transform, scale, scale);
    //防止比例叠加需要置为1
    pich.scale=1;
 }
【补充】如果需要同时响应多个手势需要重写代理方法
- (BOOL)gestureRecognizer:(UIGestureRecognizer *)gestureRecognizer shouldRecognizeSimultaneouslyWithGestureRecognizer:(UIGestureRecognizer *)otherGestureRecognizer{
    return YES;
}