Spring2.0以后的
版本中,引入了基于
注解(
Annotation)的配置。注解是JDK1.5的一个新特性。
XML配置灵活。注解和XML可以配合使用。
1. Spring的注解支持:
在spring的配置文件中引入context的
Schema命名空间,并添加注解配置标签:
class="xml">
<beans xmlns="http://www.springframework.org/schema/beans"
xmlns:xsi="http://www.w3.org/2001/XMLSchema-instance"
xmlns:context="http://www.springframework.org/schema/context"
xsi:schemaLocation="http://www.springframework.org/schema/context http://www.springframework.org/schema/context/spring-context.xsd">
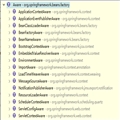
<!-- 隐式注册了多个对注解进行解析处理的处理器,如@Autowired, @Required等注解。-->
<!-- AutowiredAnnotationBeanPostProcessor - 处理@Autowire -->
<!-- CommonAnnotationBeanPostProcessor - 处理@Resource -->
<!-- PersistenceAnnotationBeanPostProcessor - 处理@PersistenceContext, @PersistenceUnit -->
<!-- RequiredAnnotationBeanPostProcessor - 处理@Required -->
<context:annotation-config/>
<!-- 注解驱动自动注入,不会驱动bean定义 -->
</beans>
实例:
public class Jurisdiction {

    public void juristic() {
        System.out.println("juristic() is executed!");
    }
}
public class Vegeterian {

    @Autowired
    Jurisdiction jurisdiction;

    public void maigre() {
        System.out.println(jurisdiction);
    }
}
beans-context.xml
<beans>
  <bean id="jurisdiction" class="com.john.spring.context.Jurisdiction" />
  <bean id="vegeterian" class="com.john.spring.context.Vegeterian" />
</beans>
测试方法:
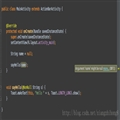
	@Test
	public void testAnnotationConfig() {
		AbstractApplicationContext ctx = new ClassPathXmlApplicationContext("beans-context.xml");
		Vegeterian vegeterian = ctx.getBean("vegeterian", Vegeterian.class);
		vegeterian.maigre();
	}
输出为null。
在beans-context.xml中添加
<beans>
  <context:annotation-config />
</beans>
重新测试,输出不为null
2. Spring扫描包:
如果有很多的包和类,在
XML文件中配置稍显繁杂,且要控制哪些包或类需要由Spring实例化时,可以使用包扫描方式。
扫描后,放入spring容器,交由spring管理
<beans>
  <!-- base-package:扫描该包及子包下面的类,实现自动注入 -->
  <!-- 注解驱动bean定义,同时驱动自动注入 -->
  <!-- 隐式注册<context:annotation-config />,所以<context:annotation-config />可以移除 -->
  <context:component-scan base-package="com.john">
  </context:component-scan>
</beans>
支持添加移除子包
<beans>
  <context:component-scan base-package="com.john">
    <context:include-filter />
    <context:exclude-filter />
  </context:component-scan>
</beans>
说明:
1. exclude-filter先于include-filter解析,include-filter不会包括被exclude-filter剔除的包
2. include-filter在exclude-filter之后定义会报SAXException异常
如何剔除一部分包,并保留其它的包:
a. 使用aspect的语法,将剔除和包括放在一个filter
表达式里面:
<beans>
<context:component-scan base-package="com.jemmy.spring.biz.ext" use-default-filters="true">
<context:exclude-filter type="aspectj" expression="com.jemmy.spring..*Impl && !com.jemmy.spring.biz.ext.impl.CouponBizImpl" />
</context:component-scan>
</beans>
支持下面几种语法:
Filter Type Example Expression Descriptionannotation org.example.SomeAnnotation 标注有SomeAnnotation的类custom org.example.MyTypeFilter Spring3新增
自定义过滤器,实现org.springframework.core.type.TypeFilter
接口
测试:
@Controller
public class MyController {
}

@Service
public class MyService {
}
component-scan-test.xml
<beans>
	<context:component-scan base-package="com.jemmy.spring.core.context">
		<context:exclude-filter type="annotation" expression="org.springframework.stereotype.Controller" />
	</context:component-scan>
</beans>
public class ComponentScanTest {

    public static void main(String[] args) {
        ApplicationContext context = new ClassPathXmlApplicationContext("spring/core/context/component-scan-test.xml");
        //MyController myController = context.getBean("myController", MyController.class);
        MyService myService = context.getBean("myService", MyService.class);
    }
}
注意:
如果类型为regex,'\'为转义符,'.'代表任意字符,'*'表明前面的字符出现0或多次,'..'在这里并不代表子包。
类型为aspectj,'\','.','*'都代表自己本身,'..'代表子包
3. 属性注入方式:
@Resource
默认按名称装配,当找不到与名称匹配的bean才会按类型装配。
@Autowired
默认按类型装配
4. bean的作用域
1. singleton
2. prototype
3. request
4. session
默认的作用域为singleton
可以在xml中配置bean的scope属性为prototype,或Bean上加@Scope("prototype")注解,这样每次getBean拿到的都是新创建的实例:
如:
<beans>
	<bean class="com.jemmy.spring.core.scope.SingletonBean" />
	<bean class="com.jemmy.spring.core.scope.PrototypeBean" scope="prototype" />
</beans>
public class SingletonBean {
}

public class PrototypeBean {
}

public class ScopeTest {
    public static void main(String[] args) {
        ApplicationContext context = new ClassPathXmlApplicationContext("spring/core/scope/scope-test.xml");
        SingletonBean singleton1 = context.getBean(SingletonBean.class);
        SingletonBean singleton2 = context.getBean(SingletonBean.class);
        System.out.println(singleton1 == singleton2); // true

        PrototypeBean prototype1 = context.getBean(PrototypeBean.class);
        PrototypeBean prototype2 = context.getBean(PrototypeBean.class);
        System.out.println(prototype1 == prototype2); // false
    }
}