前几个星期Jimmy跟我说正带的一个项目客户是阿拉伯人!要求有阿拉伯的语言支持!指定的机型是nexus s!很困扰的是亚洲版一般都吧这一语言屏蔽了!让我想办法刷一个有阿拉伯语言支持的!前几天一直尝试自己编一个img直接刷上去!但刚好我手上的源码
版本是没有阿拉伯语言设置的支持的!
当然2.3版本的源码都有DroidSansArabic.ttf这也就是说阿拉伯语言的支持都是可以的!我下了一个阿拉伯
输入法果然可以保存阿拉伯文字!只是为什么设置里没有呢!跟踪代码
发现
/home/deanye/Android/gingerbread0711nexus/packages/apps/Settings/src/com/android/LocalePicker.java中的
String[] locales = getAssets().getLocales();
这个localer中就没获得到ar的字符(阿拉伯语言的国际 Arabic, Egypt (ar_EG) 阿拉伯语(埃及) Arabic, Israel (ar_IL) 阿拉伯语(以色列))
这里可以对比一下手机上的数组是
[, bg, bg_BG, ca, ca_ES, cs, cs_CZ, da, da_DK, de, de_DE, el, el_GR, en, en_GB, en_US, es, es_ES, es_US, fi, fi_FI, fr, fr_FR, hr, hr_HR, hu, hu_HU, in, in_ID, it, it_IT, iw, iw_IL, ja, ja_JP, ko, ko_KR, lt, lt_LT, lv, lv_LV, nb, nb_NO, nl, nl_NL, pl, pl_PL, pt, pt_BR, pt_PT, rm, rm_CH, ro, ro_RO, ru, ru_RU, sk, sk_SK, sl, sl_SI, sr, sr_RS, sv, sv_SE, tl, tl_PH, tr, tr_TR, uk, uk_UA, vi, vi_VN, zh, zh_CN, zh_TW]
模拟器上有阿拉伯语言设置它的数组是
[, da, ja, nb, de, el, nl, pl, ko, fr, tr, cs, es, it, pt, ru, sv, en_CA, uk_UA, en_ZA, en_GB, id_ID, en_IE, bg_BG, ar_EG, en_SG, th_TH, fi_FI, sl_SI, sk_SK, zh_CN, hi_IN, en_IN, vi_VN, ro_RO, hr_HR, ca_ES, sr_RS, en_US, es_US, lt_LT, pt_PT, en_AU, hu_HU, lv_LV, zh_TW, en_NZ, fr_CA, nl_BE, fr_BE, de_DE, sv_SE, de_CH, fr_CH, it_CH, tl_PH, de_LI, da_DK, he_IL, ar_IL, nl_NL, pl_PL, nb_NO, ja_JP, pt_BR, fr_FR, el_GR, ko_KR, tr_TR, es_ES, de_AT, it_IT, ru_RU, cs_CZ, en, th, fi, ar, hu, id, he, zh, sk, uk, ro, hr, sr]
追了下代码觉得挺麻烦的于是想下一个网上现成的!
带刷机没有自己编译源码的来的方便!
自己编译的话刷机方法如下:
(1) how to build source code:
  http://source.android.com/source/initializing.html
  http://source.android.com/source/building.html
(2) how to setup nexus
  1. use up key+power key into setpup module on nexus
  2. cd (nexus source code dir)
  3. cd out/target/product/crespo/
  4. ../../../host/linux-x86/bin/fastboot flash boot boot.img
  5. ../../../host/linux-x86/bin/fastboot flash system system.img
  6. ../../../host/linux-x86/bin/fastboot reboot
下了网上的话以我下的cyanogenmod提供的为例:
首先选择自己的机型:http://www.cyanogenmod.com/devices
然后选择一个比较新的版本下载: 我选的nexus s标准版http://download.cyanogenmod.com/?type=stable&device=crespo
下面开始刷机我就直接贴官方的介绍了不翻译了:
Before you do anything ― Make a backup
Don't forget to back up your data. If you have synced the device with a Google account, then the contacts, calendar,
Gmail, & select other Google-related data will not be lost and will come back after the next sync. However, you should backup anything you want to keep that is not stored on the SD card:
SMS/MMS messages,
Call Log,
Bookmarks,
Applications; use Titanium Backup or the Astro File Manager, for example,
Any application data not on the SD card.
It would also be a good idea to backup everything stored on the SD card in the rare case the SD card must be formatted to resolve any major problems.
MyBackup Root, SMS Backup & Restore, and Call Backup & Restore are all free applications that
can assist with backing up your data.
Unlocking the Bootloader
Warning: Unlocking the
Nexus S's bootloader will void the warranty.
If the Bootloader on the Nexus S
has already been unlocked, you may skip this section.
1.You will need fastboot on the computer to unlock the bootloader on the Nexus S. Follow the Android SDK guide, to get the fastboot on the computer.
2.Power the Nexus S down, and hold Volume Up & the Power button until booted into the bootloader. You should see a white screen with three skating androids.
3.Connect the Nexus S to the computer via USB.
4.On the computer, open terminal and run:
fastboot oem unlock
5.On the Nexus S, a prompt will open up asking you if you are sure you want to unlock the bootloader and again warning you that doing so will void your warranty. If you agree to these terms, press Volume Up to select Yes, and then press the Power button to confirm.
NOTE: Unlocking the bootloader wipes the device.
6.The Nexus S will reboot.
Installing the ClockworkMod Recovery Image
If you have already flashed a custom recovery image, skip this section.
1.Download the latest version of the ClockworkMod Recovery:
ClockworkMod Recovery 4.0.0.2: Download
2.Place the ClockworkMod Recovery Image in the same folder as fastboot (the /tools folder with the Android SDK folder).
3.Power the Nexus S down, and hold Volume Up & the Power button until booted into the bootloader. You should see a white screen with three skating androids.
4.Connect the Nexus S to the computer via USB.
5.On the computer, open terminal and run:
fastboot flash recovery recovery-clockwork-4.0.0.2-crespo.img
The ClockworkMod Recovery should now be installed on the Nexus S.
Flashing CyanogenMod
NOTE: In order to flash CyanogenMod via ROM Manager, root access is required. Attaining root access is outside the scope of this wiki page
Method via Recovery
1.Download the latest version of CyanogenMod.
Optional: Download the Google Apps for the device.
2.Place the CyanogenMod update.zip file on the root of the SD card.
Optional: Place the Google Apps .zip on the root of the SD card also.
3.Boot into the ClockworkMod Recovery.
4.Once the device boots into the ClockworkMod Recovery, use the side volume buttons to move around, and either the power button or the trackball to select.
Optional: Select backup and restore to create a backup of current installation on the Nexus S.
5.Select the option to Wipe data/factory reset.
6.Then select the option to Wipe cache partition.
7.Select Install zip from sdcard.
8.Select Choose zip from sdcard.
9.Select the CyanogenMod update.zip.
Optional: Install the Google Apps by performing steps 7 - 9 again and choosing the Google Apps update.zip.
10.Once the installation has finished, select +++++Go Back+++++ to get back to the main menu, and select the Reboot system now option. The Nexus S should now boot into CyanogenMod.
Method via ROM Manager
1.Launch RomManager.
Optional: Choose the first option in the app, Flash ClockworkMod Recovery to update to the latest version.
2.Select the Download ROM option from the main menu in the ROM Manager.
3.Select the CyanogenMod option, and then choose the latest version of CyanogenMod from the menu.
Optional: When you select the latest version of CyanogenMod, check the Google Apps* option.
4.Once the ROM is finished downloading, it asks if you would like to Backup Existing ROM and Wipe Data and Cache.
5.If Superuser prompts for root permissions check to Remember and then Allow.
6.The Nexus S will now reboot into the recovery, wipe data and cache, and then install CyanogenMod. When it's finished installing it will reboot into CyanogenMod.
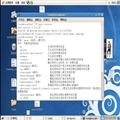
刷机成功后:
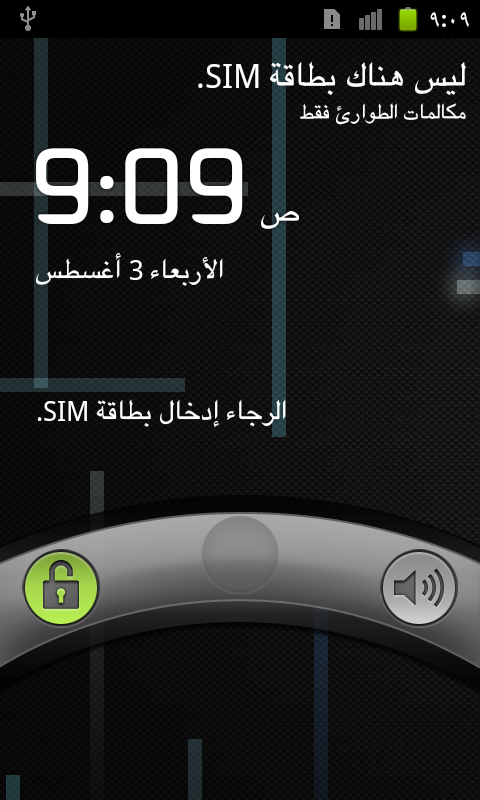
阿拉伯语言设置:


- 大小: 286.1 KB

- 大小: 285.3 KB

- 大小: 18.3 KB
- recovery-clockwork-4.0.0.2-crespo.img.zip (3.9 MB)
- 下载次数: 0