I figured I’d do a quick tutorial about something a little more difficult, but still very important. I’m going to take you step-by-step through integrating a maxscript document and a C# class library so that you can access the powerful and robust features of the dotnet framework in the rather limited environment that maxscript provides. This lets you do such powerful things as access databases, grab web-deployed content, and more. It is my opinion that dotnet connectivity is the best thing to ever happen to maxscript.
This tutorial is written for C# users. However, the themes here apply to any language that is part of the common language runtime (CLR) framework. If you chose to use C++, VB, etc. you should still be able to compile a class library that can integrate in much the same way.
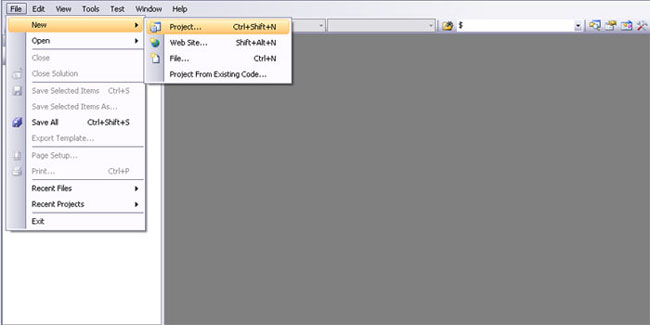
New class library creation.
So from the startup screen in visual studio, go ahead and go to File > New > Project.
Select a C# class library. I’m going to name mine “Maxscript Sandbox”.
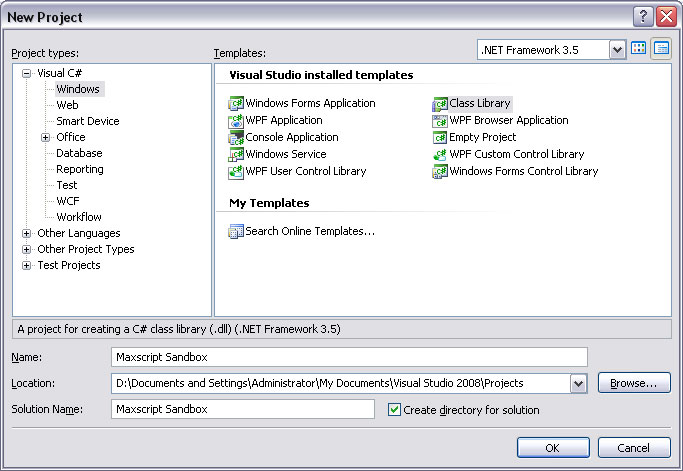
Name your library.
Now let’s write a test class for our new class library. In this screenshot I’ve written a very simple class that contains a string you pass on creation. Once the object exists, you can access the name, or you can call a function that provides you with a sentence that includes the name. Simple enough!
Rename the class to TestObject, and fill in the code you see below.
public class TestObject
{
    string Name;
    public TestObject(string thisName)
    {
        Name = thisName;
    }

    public string GetLongName()
    {
        return ("You can call me " + Name + "!");
    }
}
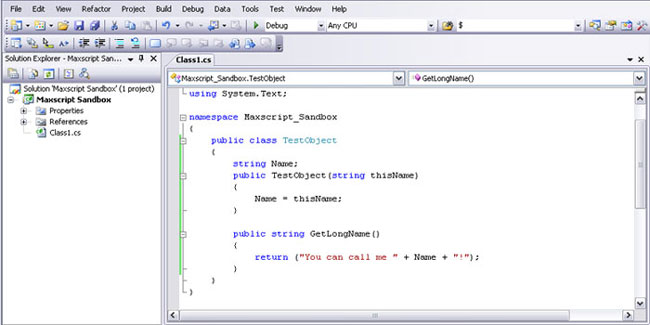
Insert some placeholder code.
From the drop-down along the top bar, change the build mode from Debug to Release. This means that the compiler will optimize the code for fast execution rather than for debugging and trying to find out what the problem is. On that note, I think there exists a way to debug the class from your script. However, it’s outside the scope of this tutorial. If you’re burning to debug, make a console app that wraps your class and tests functionality from there.
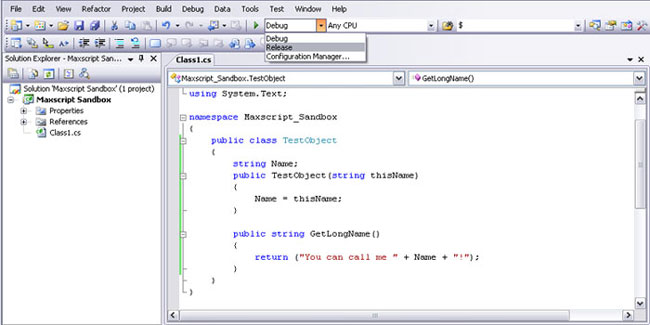
Change to "Release" compilation.
Now, hit F6 or go to Build > Build Solution.
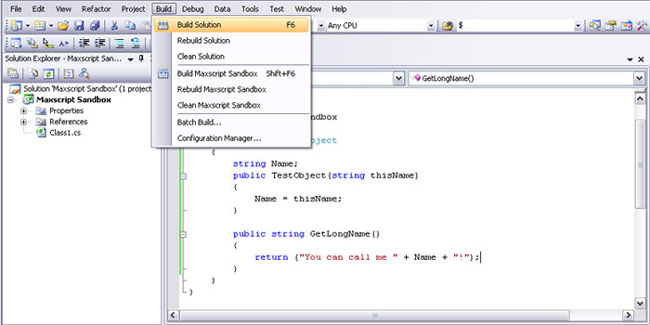
Build the solution to a DLL.
I’ve commented a lot of the code in the next image, but it’s actually a lot shorter than it looks. All you have to do is load the new class library you’ve created, instantiate the object, and then do whatever you want with it.
Notice that I’ve moved the .dll file that resulted from building my class library to somewhere shorter. Normally, your class library would compile to a directory within the project folder you selected when you created the project (like C:/…/Maxscript Sandbox/ Maxscript Sandbox/bin/release/Maxscript Sandbox.dll). I’ve moved that file from that incredibly long directory to something more digestable like C:/Temp/Maxscript Sandbox.dll.
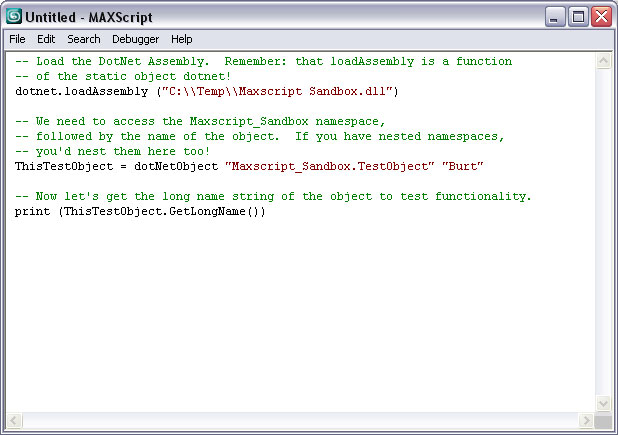
Call the library from Maxscript.
dotnet.loadAssembly ("C:\Temp\Maxscript Sandbox.dll")
ThisTestObject = dotNetObject "Maxscript_Sandbox.TestObject" "Burt"
print (ThisTestObject.GetLongName())
When you run this program, and the dll is in the right place, you’ll find that it outputs as though the object was a native max object. However it’s actually running in the dotnet framework. You can read more about creating objects and the syntax surrounding the Maxscript/C# connection in the documentation. This tutorial was just meant to clarify some of the logistical issues surrounding getting it working.
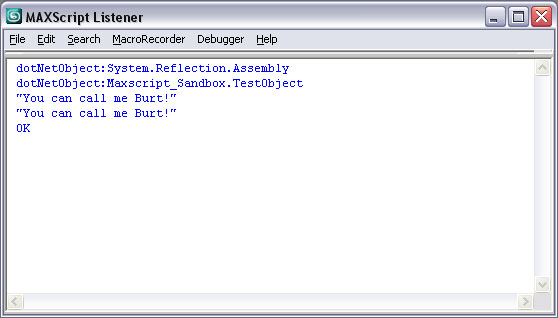
The final output from the script.
Until next time, happy scripting!