好久没有写了,最近项目用到RabbitMQ,找了一些资料试验,最后终于成功了,把安装配置的步骤分享给大家。
一、Erlang
安装具体过程:
1.双击otp_win32_R16801.exe(不同版本可能命名字不一样),选择next
2.默认安装在C盘,建议程序安装在非系统盘比如D盘(如果安装在C盘可能会出现一些权限问题),修改好安装路径后,选next:
3.进入安装程序,选择install,即可完成安装。
配置环境变量:在系统变量下添加 变量名:ERLANG_HOME,变量值:C:\Program Files (x86)\erl6.1
二、安装rabbitMQ
rabbitmq-server-3.3.5.exe
安装完成增加环境变量,双击path,在其后面增加:;C:\Program Files (x86)\RabbitMQ Server\rabbitmq_server-3.3.5\sbin
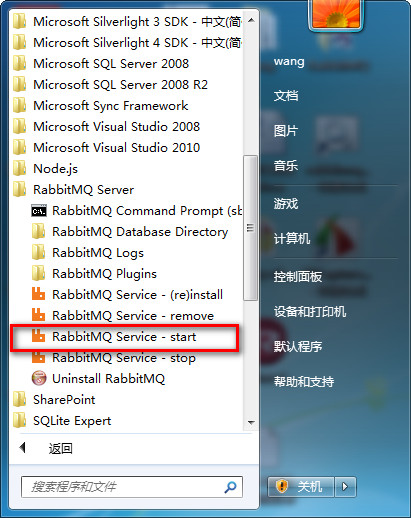
启动start

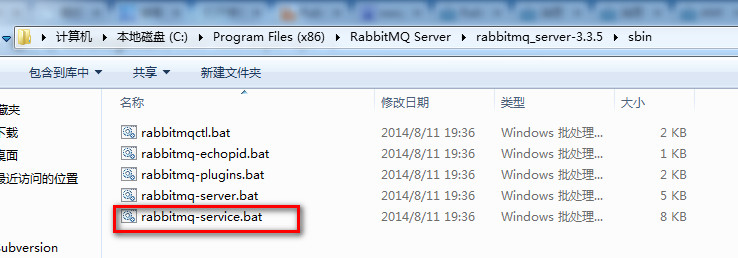
cmd进到sbin目录,输入rabbitmq-service启动
或是直接找到rabbitMQ安装目录下C:\Program Files (x86)\RabbitMQ Server\rabbitmq_server-3.3.5\sbin
打开浏览器登录http://localhost:15672进入监视页面说明配置成功,用户名和密码:guest

配置成功以后就是发送消息,采用Exchange。
Rabbit的核心组件包含Queue(消息队列)和Exchanges两部分,Exchange的主要部分就是对信息进行路由,通过将消息队列绑定到Exchange上,则可以实现订阅形式的消息发布及Publish/Subscribe在这种模式下消息发布者只需要将信息发布到相应的Exchange中,而Exchange则自动将信息分发到不同的Queue当中。
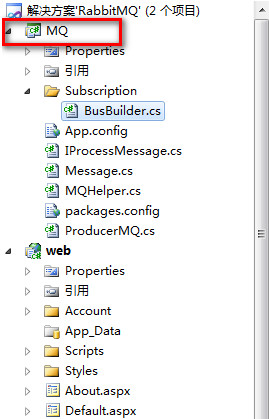
在.Net环境下有基于RabbitMQ有很多有API的选择,最后选择了比较简单的EasyNetQ(http://easynetq.com/)
    /// <summary>
    /// 消息服务器连接器
    /// </summary>
    public class BusBuilder
    {
        public static IBus CreateMessageBus()
        {
            //消息服务器连接字符串

            string connString = "host=172.17.186.50:5672;virtualHost=rb;username=admin;password=123";
            return RabbitHutch.CreateBus(connString);
           // return RabbitHutch.CreateBus(connectionString.ConnectionString);
        }
    }
 /// <summary>
        /// 发送消息
        /// </summary>
        public static void Publish(Message msg)
        {
            //// 创建消息bus
            IBus bus = BusBuilder.CreateMessageBus();

            try
            {
                using (var publishChannel = bus.OpenPublishChannel())   //创建消息管道
                {
                    publishChannel.Publish(msg, x => x.WithTopic(msg.MessageRouter));  //通过管道发送消息
                }
            }
            catch (EasyNetQException ex)
            {
                //处理连接消息服务器异常
                // MessageHelper.WriteFuntionExceptionLog("Publish", ex.Message + " | " + ex.StackTrace);

            }

            bus.Dispose();//与数据库connection类似,使用后记得销毁bus对象
        }
    /// <summary>
        /// 接收消息
        /// </summary>
        /// <param name="msg"></param>
        public static void Subscribe(Message msg, IProcessMessage ipro)
        {
            //// 创建消息bus
            IBus bus = BusBuilder.CreateMessageBus();

            try
            {
                bus.Subscribe<Message>(msg.MessageID, message => ipro.ProcessMsg(message), x => x.WithTopic(msg.MessageRouter).WithArgument("x-ha-policy", "all"));

            }
            catch (EasyNetQException ex)
            {
                //处理连接消息服务器异常
              //  MessageHelper.WriteFuntionExceptionLog("Subscribe", ex.Message + " | " + ex.StackTrace);
            }
        }
添加虚拟主机

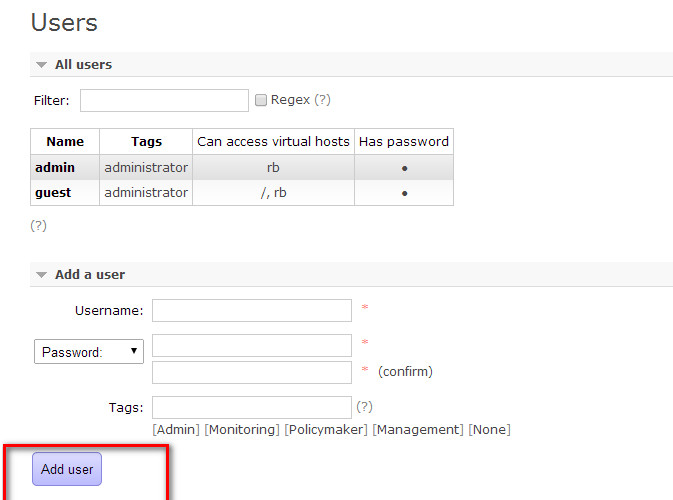
添加用户

执行代码就会自动建立Exchanges,名字是根据项目名来的


点击新建的Exchanges进入新建queue

最后调用接口测试发送,代码如下:
  protected void Button1_Click(object sender, EventArgs e)
        {
            MQ.Message msg = new MQ.Message();
            msg.MessageID = "testkey";
            msg.MessageBody = "发送测试";
            msg.MessageTitle = "hello world";
            msg.MessageRouter = "testKey";
            MQ.MQHelper.Publish(msg);

        }
msg.MessageRouter = "testKey"——这句配置很重要,取决于上一步的Routing Key.

推送消息成功!
源码下载:http://pan.baidu.com/s/1sjExnWh