学习也要借鉴,最近在学习Android,想看一下市面上大的Android应用是怎么个构架的,所以学习了下Android反编译的相关知识,网上有很多种做法,下面的是我在几种方案中觉得效果最好的方案介绍一下:
(事先声明本文仅供学习之用,若存在任何侵权马上删除)
?
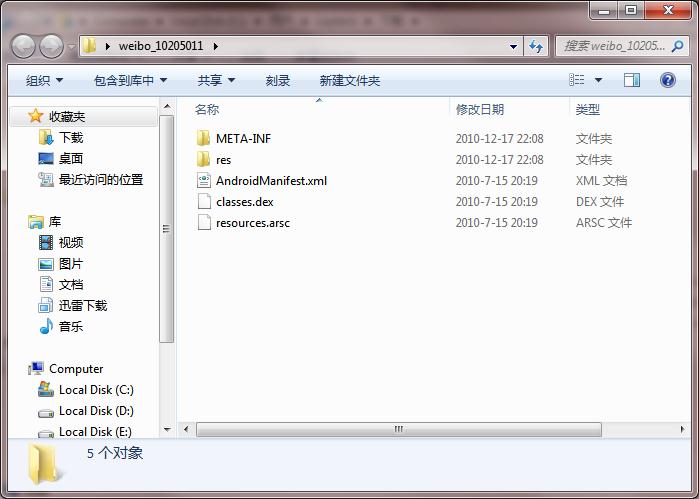
首先Android的apk包也是可以解压的,把它改成后缀RAR的就能直接用RAR解压了,得到的文件如下图:

其中res为资源文件夹,而下面的AndroidManifest.xml和classes.dex则是我们这次反编译的重点。
?
AndroidManifest.xml也被编译过了。。。哎。。这编译连XML文件都没放过,而classes.dex就是Android的Jar包的复刻版了,现在要分两步走:
?
一、xml方面
?
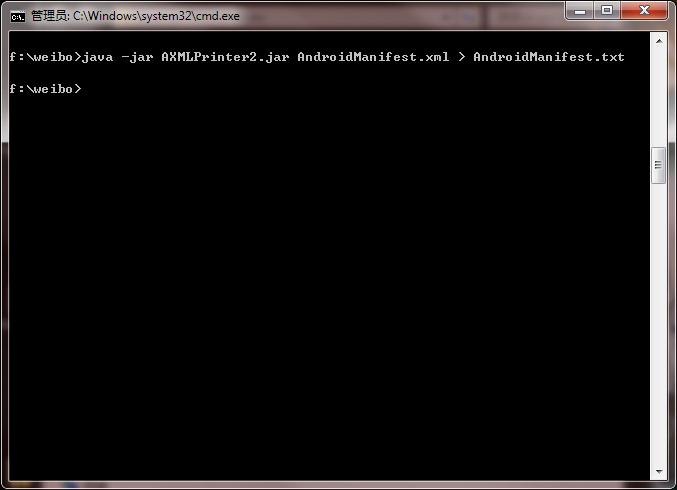
市面上也有好多反编译方法,经我实践用AXMLPrinter2.jar(http://android4me.googlecode.com/files/AXMLPrinter2.jar)反编译出来的XML文件最清晰。
?
命令:java -jar AXMLPrinter2.jar AndroidManifest.xml > AndroidManifest.txt
?

?
代码片段如下:
<manifest
	xmlns:android="http://schemas.android.com/apk/res/android"
	android:versionCode="22"
	android:versionName="2.0.2"
	package="com.sina.weibo"
	>
	<application
		android:label="@7F090012"
		android:icon="@7F020059"
		android:name="WeiboApplication"
		>
		<activity
			android:label="@7F090012"
			android:name=".MainTabActivity"
			android:launchMode="2"
			android:configChanges="0x000000A0"
			android:windowSoftInputMode="0x00000020"
			>
			<intent-filter
				>
				<action
					android:name="android.intent.action.MAIN"
					>
				</action>
				<category
					android:name="android.intent.category.LAUNCHER"
					>
				</category>
			</intent-filter>
			<intent-filter
				>
				<action
					android:name="android.intent.action.VIEW"
					>
				</action>
				<category
					android:name="android.intent.category.DEFAULT"
					>
				</category>
				<category
					android:name="android.intent.category.BROWSABLE"
					>
				</category>
				<data
					android:scheme="sinaweibo"
					android:host="blog"
					>
				</data>
			</intent-filter> ...
?
还是蛮清楚的吧!
?
下面是要反编译Jar包了。
?
二、dex反编译
?
由于dex文件是jar包的复刻版,所以可以导出jar包,导出工具是dex2jar(http://dex2jar.googlecode.com/files/dex2jar-0.0.7.7-SNAPSHOT.zip)
?
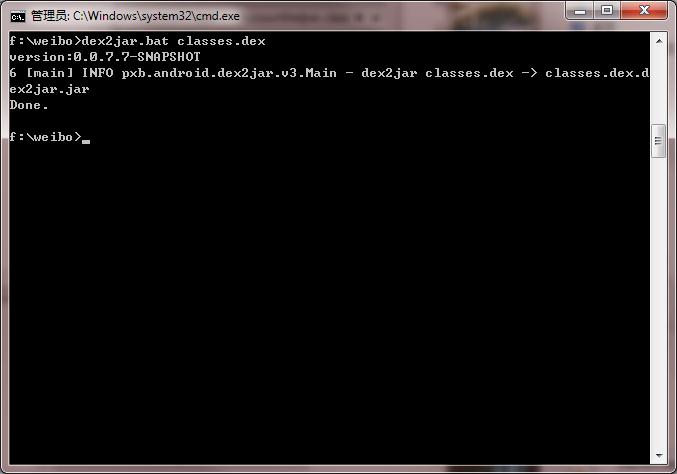
像上面差不多的在cmd里键入
?
命令:dex2jar.bat classes.dex

?
可以看到在文件夹里出现了一个classes.dex.dex2jar.jar这个jar包
?
接下来就可以看jar包的工具直接打开了,这里推荐一款jd-GUI的查看软件(http://java.decompiler.free.fr/jd-gui/downloads/jd-gui-0.3.3.windows.zip)。
下面是效果:
?
?
package com.sina.weibo;

import android.text.Editable;
import android.text.TextWatcher;
import android.widget.Button;
import android.widget.EditText;
import android.widget.TextView;
import dalvik.annotation.EnclosingMethod;

@EnclosingMethod
class CommentBlog$1
  implements TextWatcher
{
  public void afterTextChanged(Editable paramEditable)
  {
  }

  public void beforeTextChanged(CharSequence paramCharSequence, int paramInt1, int paramInt2, int paramInt3)
  {
  }

  public void onTextChanged(CharSequence paramCharSequence, int paramInt1, int paramInt2, int paramInt3)
  {
    int i = this.this$0.mEtBlog.getText().toString().length();
    String str1;
    if (i <= 140)
    {
      i = 140 - i;
      str1 = this.this$0.getString(2131296400);
      this.this$0.mTvInputNumText.setTextColor(-16777216);
      if (!this.this$0.mBtSend.isEnabled())
        this.this$0.mBtSend.setEnabled(1);
    }
    while (true)
    {
      TextView localTextView = this.this$0.mTvInputNumText;
      String str2 = String.valueOf(str1);
      String str3 = str2 + i;
      localTextView.setText(str3);
      return;
      i += -140;
      str1 = this.this$0.getString(2131296401);
      this.this$0.mTvInputNumText.setTextColor(-65536);
      if (!this.this$0.mBtSend.isEnabled())
        continue;
      this.this$0.mBtSend.setEnabled(0);
    }
  }
}
?效果还不错吧,可以好好看一阵子了。
?
仅供学习哈~~