这两天又学习了Android四大组件之一的Service。
继续分享我的学习历程。(*^__^*) 嘻嘻
(一)注意的细节:
(1)Service不是一个单独的Process,除非特别指派了,也不是一个Thread,但也不是运行在Main Thread中。
(2)Service的使用有两个目的,一是告诉系统要后台执行程序,一般是用Context.startService()来开启Service的(注意即使开启Service的Activity什么的destroy了,Service还是存在的,直到Context.stopService()或stopSelf()的调用),二是向其他的类,进程提供功能,这个一般是Context.bindService()来开启Service。
(3)Service的生命周期:
调用的Context.startService() oncreate() --> onStartCommand ()--> Service is running --> The service is stopped by its or a client--> onDestroy() --> Service is shut down
调用Context.bindService() onBind() --> Service is running(clients are bound to it) --> All client unbind by calling unbindService() -->onUnbind() --> onDestroy()
在Service生命周期中要注意的有:
①不管调用几次Context.startService(),即使这样导致多次调用onStartCommand(),但是一旦调用了Context.stopService() 或者stopSelf() ,这个Service就会停止。
②onStartCommand()返回一个int值,在Service类里有定义,比如START_STICKY,START_NOT_STICKY,START_REDELIVER_INTENT。
③onBind()需要返回一个IBinder对象,以便Context和Service交互
④当Service因为系统内存低而被杀死后,系统会重启去启动它
⑤当一个有连接到Service的Context要销毁时,要调用unbindService(ServiceConnection)来断开连接
(4)当一个Service运行在前台时,必须为状态栏提供一个notification,并且这个notification一直存在直到这个Service停止或转移到后台。要让一个Service运行在前台,只要调用startForeground()方法,这个方法有两个参数,一个是唯一的标识,另一个是Notification,比如:
Notification notification = new Notification(R.drawable.icon, getText(R.string.ticker_text), System.currentTimeMillis());
Intent notificationIntent = new Intent(this, ExampleActivity.class);
PendingIntent pendingIntent = PendingIntent.getActivity(this,0,notificationIntent,  0);
notification.setLatestEventInfo(this, getText(R.string.notification_title),getText(R.string.notification_message), pendingIntent);
startForeground(ONGOING_NOTIFICATION, notification);
(从前台移除只要调用stopForeground()方法,这个方法有一个boolean参数,表示是否移除notification。
(二)Service的使用:
(1)startService
如果只是简单的开启一个Service来完成一些工作,那只要使用Context.startService()来启动一个Service。继承Service,然后复写onCreate(),onStartCommand(Intent, int, int),onDestroy() 来实现一些自定义动作。实现起来很简单。
(2)bindService
这是一般的使用方法吧。
首先要在Service中实现一个Binder的子类,用来实现客服端对Service的调用,示例如下:
protected class BoundBinder extends Binder {

		/**
		 * 返回当前Service实例,将公有方法暴露给客户端,当然也可以是其他对象
		 *
		 * @return Service实例
		 */
		BoundService getService() {

			return BoundService.this;
		}
}
然后在onBind()方法中返回一个Binder的实例。示例如下:
 /**
	 * @see android.app.Service#onBind(android.content.Intent)
	 */
	@Override
	public IBinder onBind(Intent intent) {

		Log.i(TAG, TAG + " onBind");
		return mBind;
	}
接着在客户端实现一个ServiceConnection的接口实现类,其中onServiceConnected(ComponentName, IBinder)是当客服端连接到Service时调用的回调方法,而onServiceDisconnected(ComponentName )是当断开连接时调用的。示例如下:
private class Connection1 implements ServiceConnection {

		@Override
		public void onServiceConnected(ComponentName name, IBinder service) {

			BoundBinder binder = (BoundBinder) service;
			boundService = binder.getService();//这个方法在BoundBinder类中实现
			mText.setText(boundService.getText());// BoundService暴露给客户端的方法
			stopService(boundIntent);// 停止服务
			unbindService(connection1);// 断开连接,记得加这句话
		}

		@Override
		public void onServiceDisconnected(ComponentName name) {

			Log.i(TAG, TAG + " Contact1 onServiceDisconnected");
		}
}
最后就是连接到这个Service了,示例如下:
 /**
	 * bind to a service
	 *
	 * @param v
	 */
 public void bound(View v) {

		connection1 = new Connection1();
		boundIntent = new Intent(this, BoundService.class);
		bindService(boundIntent, connection1, BIND_AUTO_CREATE);
 }
(3)messengerService
当需要在不同的process中工作时,可以使用利用Messenger来和Service交互。
首先是在Service中实现一个Handler子类,用来出来从客服端发过来的Message,实现Handler的handleMessage(Message)方法来处理事务。使用这个Handler的实例来创建出一个Messenger对象,在onBind(Intent)中返回Messenger.getBinder()的结果。示例如下:
 /**
	 * 当客户端的Messenger发来Message则用这个Handler处理 这里简单的打印一句话。
	 * 然后通过Message绑定的Messenger对象再给客服端发送一个消息
	 */
	private Handler mHandler = new Handler() {

		/**
		 * @see android.os.Handler#handleMessage(android.os.Message)
		 */
		@Override
		public void handleMessage(Message msg) {

			Log.i(TAG, TAG + " Handler handlemessage");
			Messenger m = msg.replyTo;
			try {
				m.send(Message.obtain());
			} catch (RemoteException e) {
				e.printStackTrace();
			}
		}
	};
 private Messenger mMessenger = new Messenger(mHandler);
        /**
	 * @see android.app.Service#onBind(android.content.Intent)
	 */
	@Override
	public IBinder onBind(Intent intent) {

		Log.i(TAG, TAG + " onBind");
		return mMessenger.getBinder();
	}
接着是在客户端,和bundService一样也是实现一个ServiceConnection的接口实现类,实现两个接口回调方法,(和在bundService不太一样,主要是获得了一个Messenger对象,用它发送Message,同时实现一个Handler子类,处理来自Service的Message,并使用这个Handler创建一个Messenger对象,绑定到要发送给MessengerService的Message中。示例如下:
 private class Connection2 implements ServiceConnection {

		/**
		 * 向MessengerService发送一个Message,这个Message中含有当前类中的一个Messenger实例,方便MessengerService和这个类通信
		 *
		 * @see android.content.ServiceConnection#onServiceConnected(android.content.ComponentName,android.os.IBinder)
		 */
		@Override
		public void onServiceConnected(ComponentName name, IBinder service) {

			messenger = new Messenger(service);
			Message message = Message.obtain();
			message.replyTo = mMessenger;// 将Message的replyTo绑定到客户端定义的Messenger,以便于MessengerService向客户端发送信息
			try {
				messenger.send(message);
			} catch (RemoteException e) {
				e.printStackTrace();
			}
		}

		@Override
		public void onServiceDisconnected(ComponentName name) {

			Log.i(TAG, TAG + " Contact2 onServiceDisconnected");
		}

	}
 private Handler mHandler = new Handler() {

		/**
		 * 处理从MessengerService返回的Message,提示服务,断开连接
		 *
		 * @see android.os.Handler#handleMessage(android.os.Message)
		 */
		@Override
		public void handleMessage(Message msg) {

			Log.i(TAG, TAG + " Handler handleMessage");
			stopService(messengerIntent);
			unbindService(connection2);
		}

	};

	/**
	 * 用于MessengerService向Handler发送Message的Messenger
	 */
	private Messenger mMessenger = new Messenger(mHandler);
最后和boundService一样,使用bindService()来连接到Service。
(4)如果Service中需要使用多线程来处理事务,那么可以考虑继承IntentService类。这个类线程安全,而且使用很简单,实现onHandleIntent() 方法就可以了,如果自己实现例如onCreate(), onStartCommand(), onDestroy()这些方法时,记得调用父类里的相应方法。示例如下(来自:
android-sdk\docs\guide\topics\fundamentals\services.html):
public class HelloIntentService extends IntentService {

	/**
	 * A constructor is required, and must call the super IntentService(String)
	 * constructor with a name for the worker thread.
	 */
	public HelloIntentService() {

		super("HelloIntentService");
	}

	/**
	 * The IntentService calls this method from the default worker thread with
	 * the intent that started the service. When this method returns,
	 * IntentService stops the service, as appropriate.
	 */
	@Override
	protected void onHandleIntent(Intent intent) {

		// Normally we would do some work here, like download a file.
		// For our sample, we just sleep for 5 seconds.
		long endTime = System.currentTimeMillis() + 5 * 1000;
		while (System.currentTimeMillis() < endTime) {
			synchronized (this) {
				try {
					wait(endTime - System.currentTimeMillis());
				} catch (Exception e) {
				}
			}
		}
	}
}
(5)AIDL (Android Interface Definition Language) Service
对于AIDL的介绍参考:android-sdk/docs/guide/developing/tools/aidl.html
它能实现把复杂的对象分解成系统能理解的简单对象,然后系统通过他们来实现远程调用Messenger也是基于AIDL来做他的底层结构。顺便一提的是,Messenger创建了一个队列让所以的客户端请求都在同一个线程内,如果需要同时处理多个请求,就使用这种AIDL方法。都是大多数程序都不需要使用这种技术。
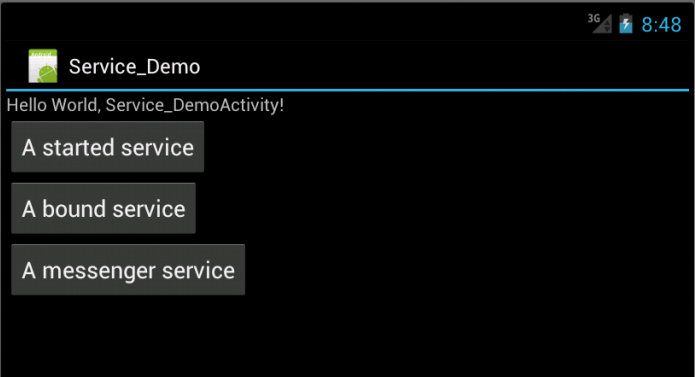
下面是Demo运行的截图。
程序的开始,各种丑陋啊~~~
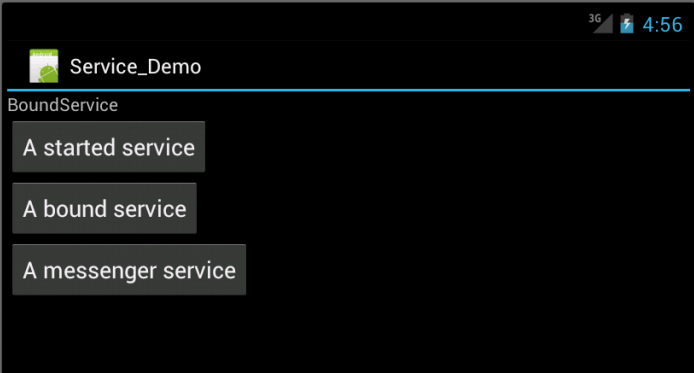
 以此点击按钮后,注意有点小变化哦~~~
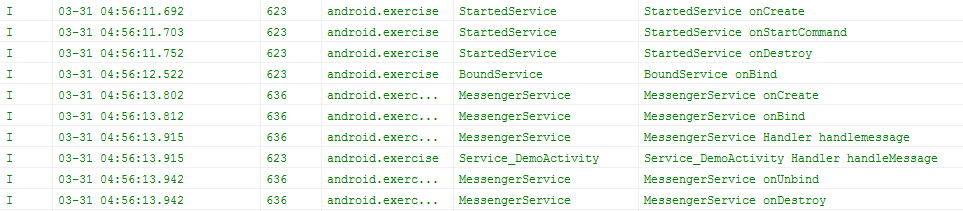
 在Logcat的输出~~~
 我是菜鸟,我犯错我开心,希望大家能不吝指教,谢谢啦!
转载请注明来自:
我是菜鸟,我犯错我开心,希望大家能不吝指教,谢谢啦!
转载请注明来自:http://zhenzxie.iteye.com/blog

- 大小: 19.4 KB
- Service_Demo.zip (69.2 KB)
- 下载次数: 11

- 大小: 61.3 KB